Flowtly's leave management covers the whole cycle: employees request time off, managers approve or deny, and HR sees the company-wide planner. This tutorial walks you through the employee view, the request form, and the approval workflow.
What you'll do
- Open your leave dashboard
- Submit a new absence request
- Review and approve team leave requests
Step 1: Open your leave dashboard
From the sidebar, click My days off. You'll see your Holiday history and Leave requests, with your Leave balance and Pending totals at the bottom of the page.
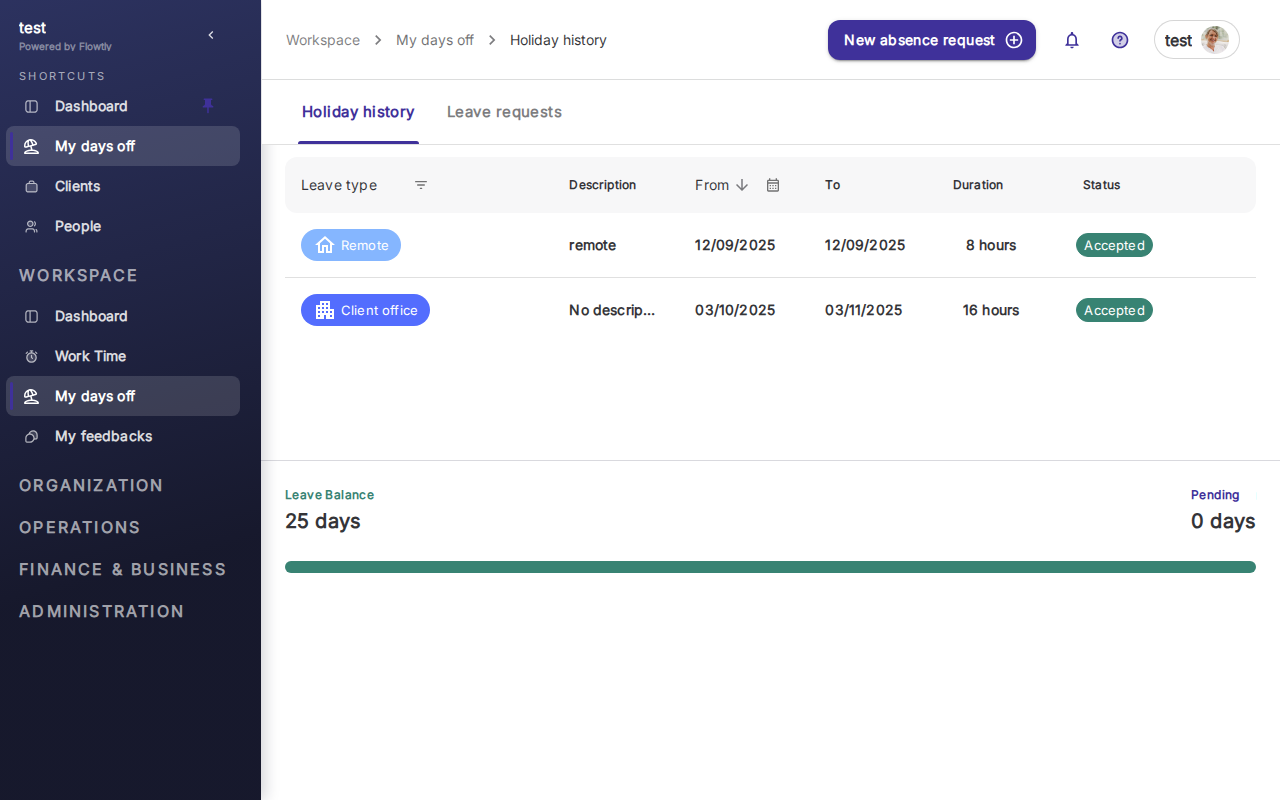
Each row shows the leave type (Vacation, Client visit, sick leave, etc.), description, dates, duration in hours or days, and status (Approved, Pending, Rejected). The green progress bar shows how much of your annual allowance you've used.
Step 2: Submit a new absence request
Click New absence request in the top-right. Flowtly opens a modal with a type selector, description field, and a calendar for picking your dates.
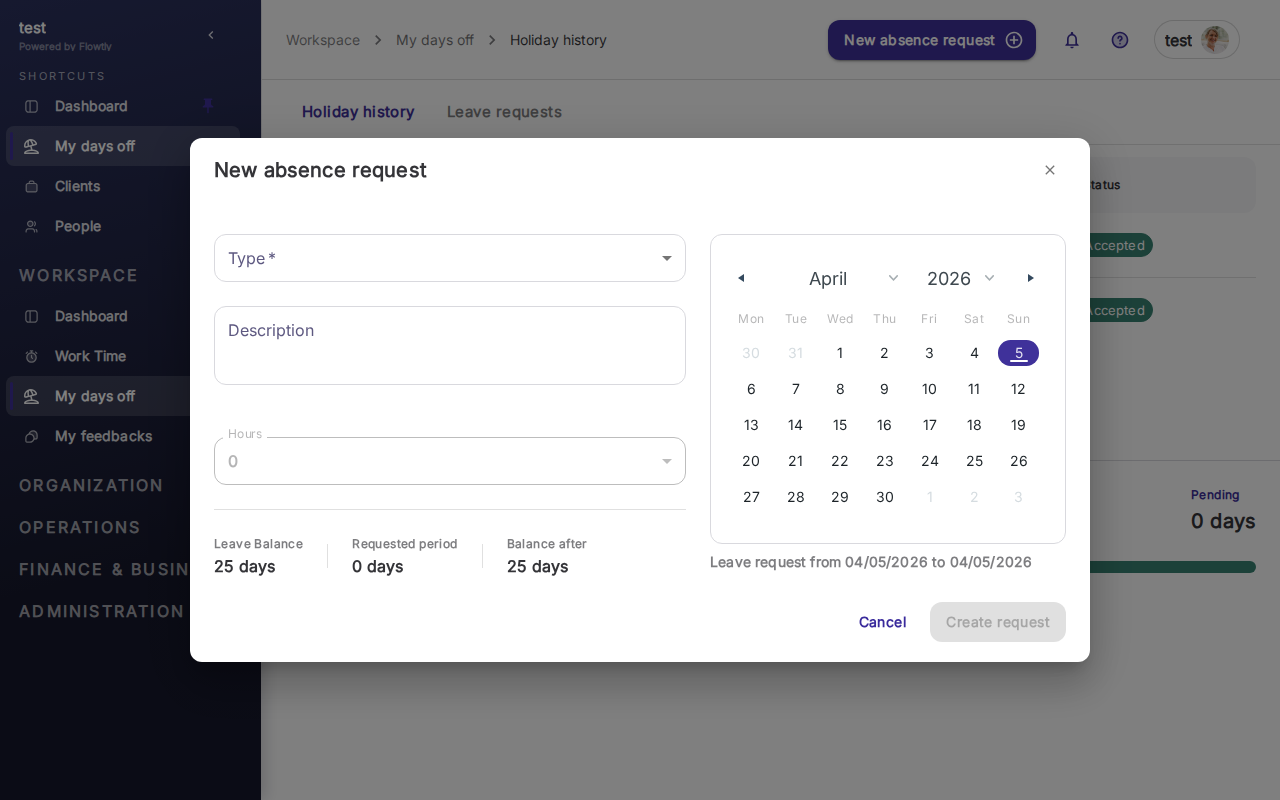
Pick the leave type, select start and end dates from the calendar, and optionally add a description. The modal shows your current balance, the requested days, and your balance after the request. Click Create request to submit.
Tip: Requests go into "Pending" status until a manager approves them. Your balance updates only once the request is approved.
Step 3: Review and approve team requests
If you're a manager, click Manage requests under People → Holidays. You'll see all requests from your team with status filters (Pending, Approved, Rejected), along with the employee, leave type, dates, and duration.
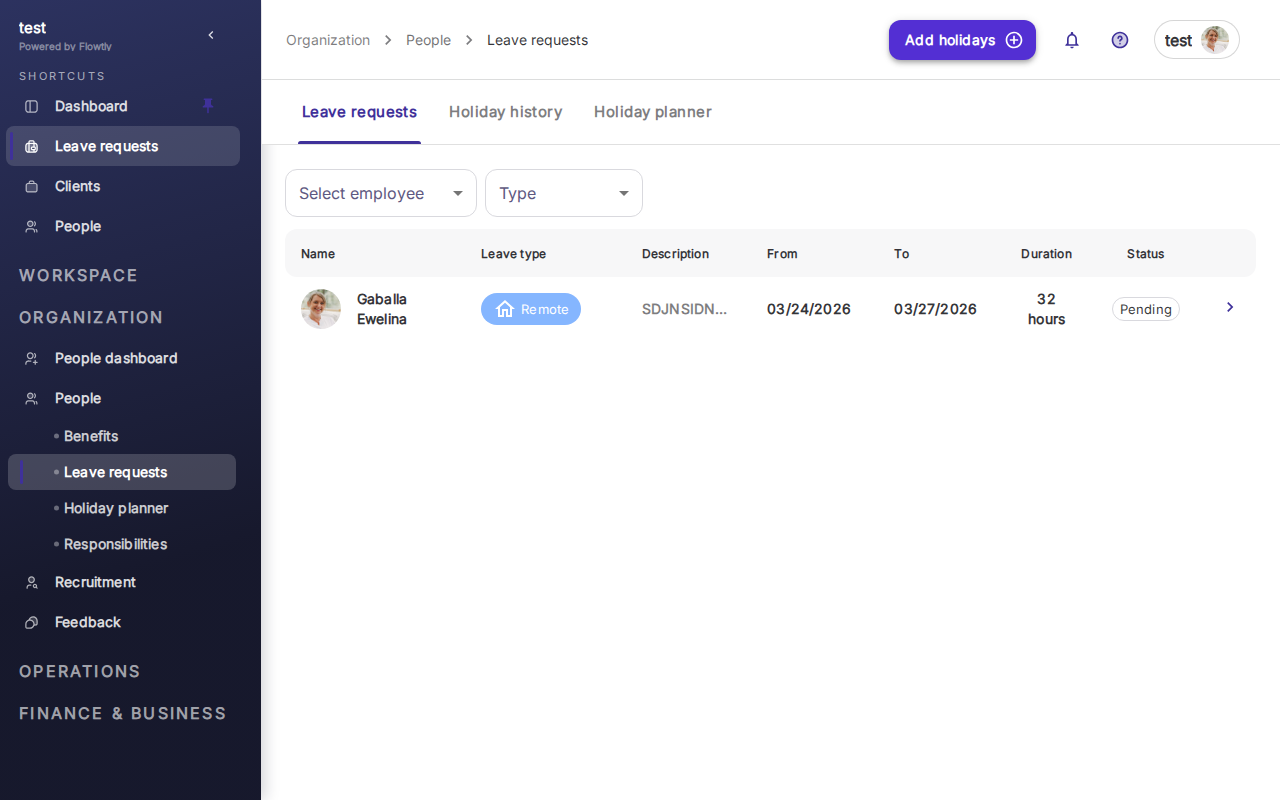
Click a pending request to approve, reject, or comment. Approved requests appear on the company-wide Holiday planner calendar, so everyone can see who's away.
Important: Set up auto-approval only for short absences (1 day or less). Longer requests benefit from a manager's review to catch schedule conflicts.
You're finished
Your team now has a working leave workflow: employees request, managers approve, everyone sees the planner. From here, configure custom leave types (parental leave, remote work, training) from the settings area, and tie approvals into your organization's hierarchy.